What you’ll learn
- How to import poly WAV or multiple WAV files.
- How to choose the MXF edit rate.
- How to choose the MXF wrapping format.
- How to select Mono, Stereo, 5.1, or 7.1.
- How to assign source audio to DCP channels.
- What DaCaPo validates before conversion.
- How to use the generated DCP PCM MXF as main audio, HI, or VI-N.
Before you begin
Before importing the audio, confirm the intended DCP channel layout and the channel order of the supplied WAV material.
For multiple-file imports, make sure the WAV files belong to the same mix.
Poly WAV or multiple WAV files
DaCaPo can import multi-channel audio supplied either as a poly WAV or as multiple WAV files.
Poly WAV
A poly WAV contains several audio channels in a single WAV file.
When importing a poly WAV, review the channel layout and make sure the channels correspond to the intended DCP audio configuration.
Multiple WAV files
Multi-channel audio can also be supplied as separate WAV files.
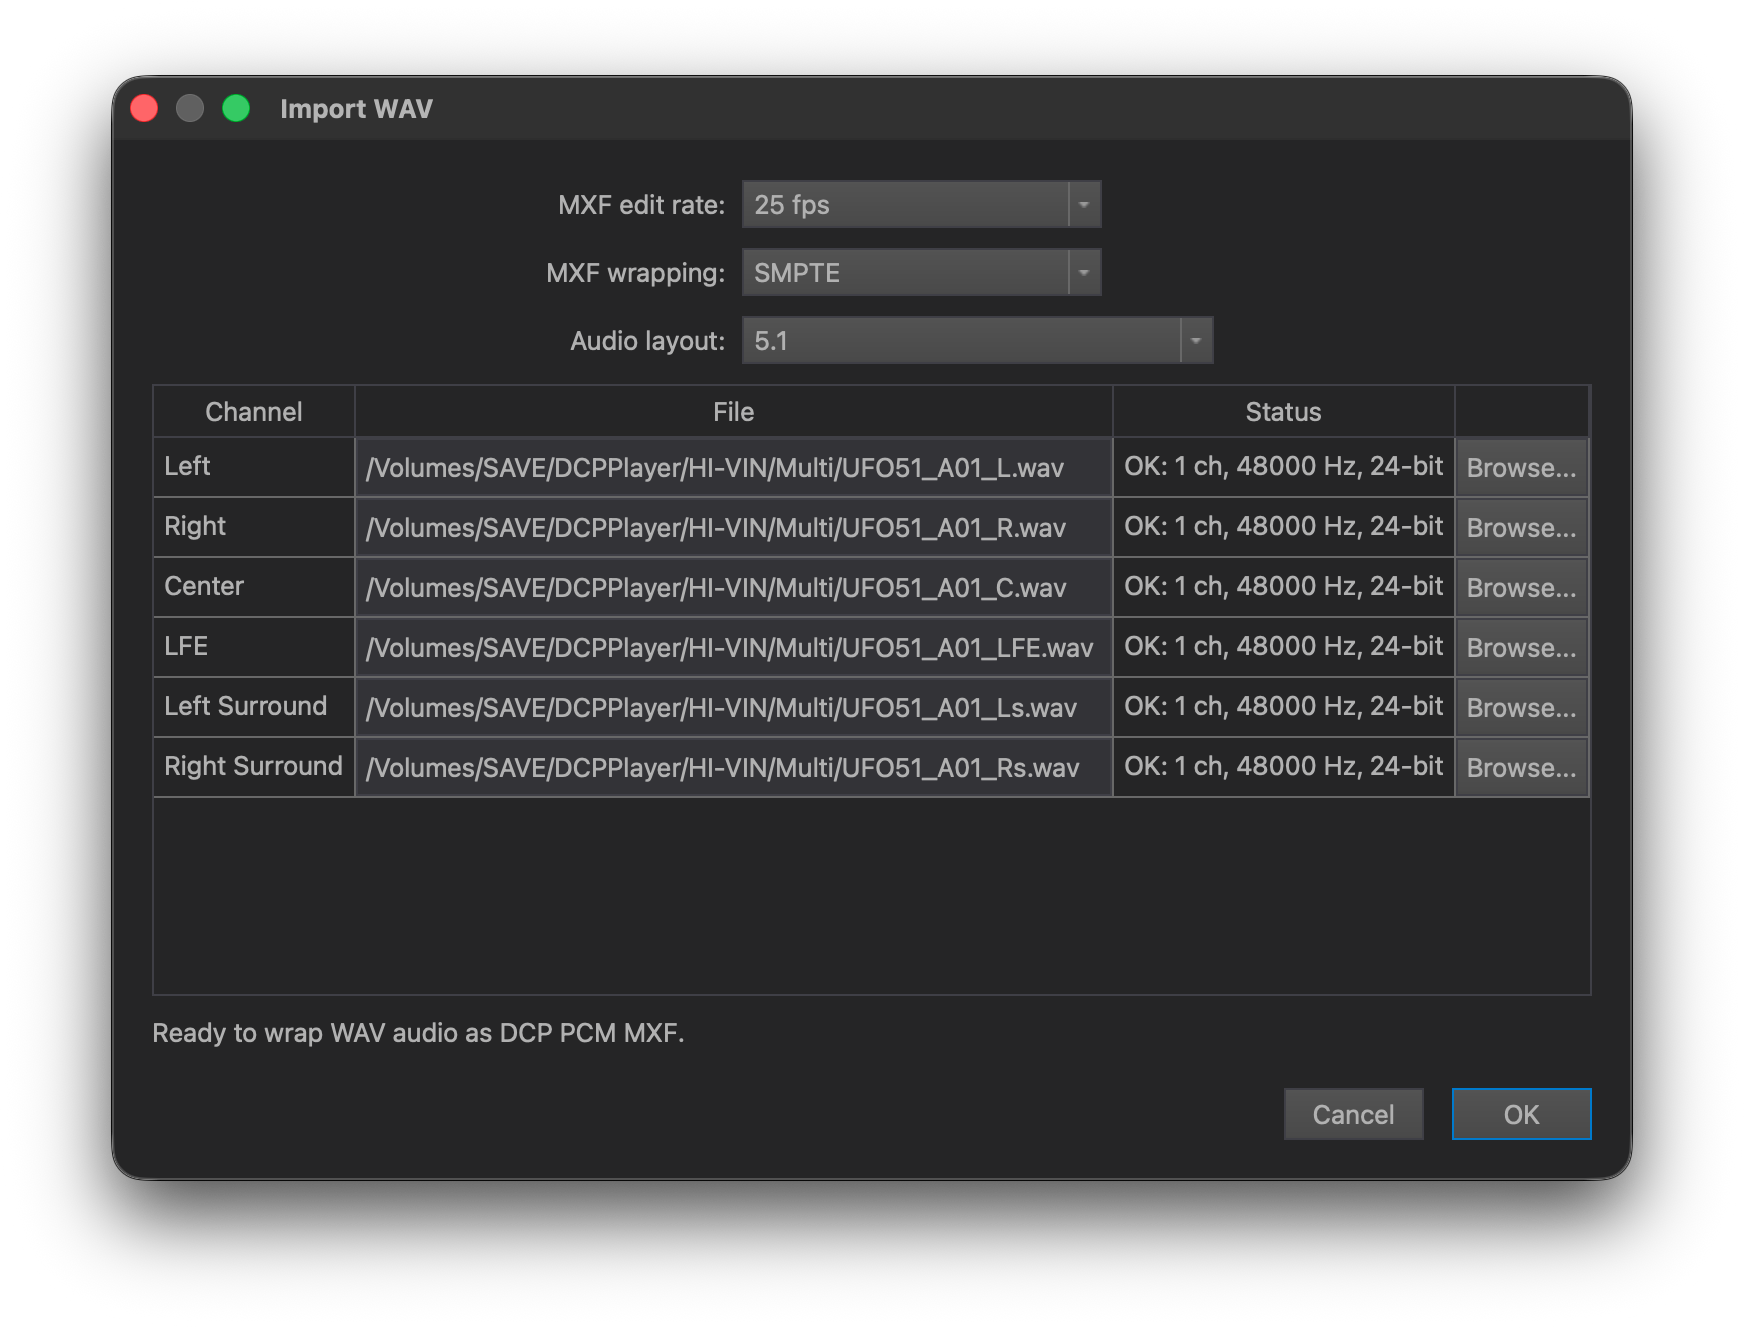
In this workflow, assign each WAV file to the appropriate destination channel in the WAV Import dialog.
Choose Import WAV
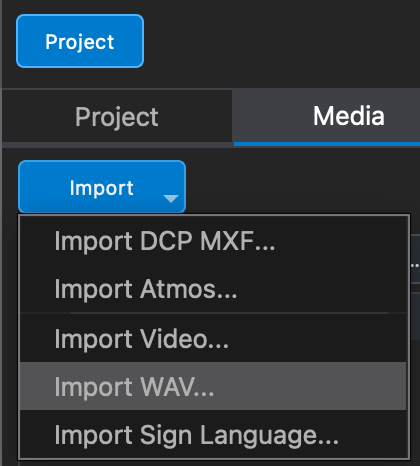
Open the Media tab, click Import, and choose Import WAV.
Select the MXF edit rate
Choose the edit rate for the generated DCP PCM MXF.
Choose the MXF wrapping format
Select the required MXF wrapping format for the generated DCP PCM MXF.
Select the audio layout
Supported layouts include:
- Mono
- Stereo
- 5.1
- 7.1
Review the channel assignment
For multi-channel audio, confirm that the source channels are assigned to the correct destination channels.
When importing multiple WAV files, assign each individual file to the required destination channel.
When importing a poly WAV, review the channels contained in the file and make sure they correspond to the selected audio layout.
DaCaPo validates the WAV files
Before conversion, DaCaPo validates all imported WAV files.
The validation includes:
- Bit depth
- Sample rate
- Channel configuration
- Duration consistency
Convert to DCP PCM MXF
Start the import after reviewing the settings and channel assignments.
DaCaPo converts the WAV audio to DCP PCM MXF format.
Find the generated MXF in the Media tab
After conversion, the generated MXF is automatically added to the Media tab.
The asset can be previewed and used as main audio, HI, or VI-N.
Use the MXF as main audio
The generated DCP PCM MXF can be used as main audio in a Timeline.
Use the MXF as HI or VI-N
The generated MXF can also be used as HI or VI-N audio.
Common problems
The WAV files cannot be converted together
Check the bit depth, sample rate, channel configuration, and duration consistency of the source files.
The channels are in the wrong order
Review the source channel order and the destination channel assignments in the WAV Import dialog.