What you’ll learn
- How to import replacement picture or audio MXF essence.
- Why it is useful to duplicate the source Timeline first.
- How to use Replace Picture Reel or Replace Main Audio in Reel.
- How to set Source TC In, Start Reel, and End Reel.
- What DaCaPo validates before replacement.
- How to isolate a smaller section by splitting the reel first.
- How to export and verify the corrected version.
When should you replace picture or main audio?
Replacement is useful when an existing DCP is mostly correct but one or more reels need updated picture or main sound.
Typical examples include:
- Replacing a corrected picture reel.
- Replacing a dubbed or remixed main audio reel.
- Correcting a short section after splitting it into its own reel.
- Creating a VF that reuses all unaffected assets from the OV.
Before you begin
Load the source DCP and select the Timeline that should receive the replacement.
Confirm that the replacement MXF belongs to the correct version and uses a compatible package profile, frame rate, wrapping format, and essence type.
Duplicate the Timeline
Before making structural changes, create a duplicate of the source Timeline.
This preserves the original composition and gives the replacement version its own Timeline inside the Package.
Import the replacement MXF
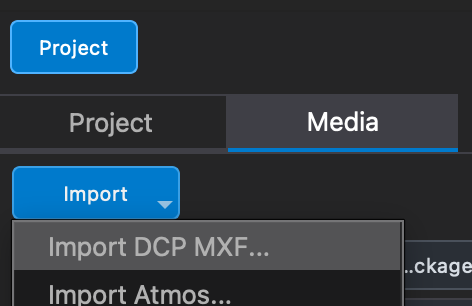
Open the Media tab, click Import, and choose Import DCP MXF.
Select the replacement picture or audio MXF.
DaCaPo identifies the MXF type and adds supported DCP picture or audio essence to Imported Media.
Select the imported asset
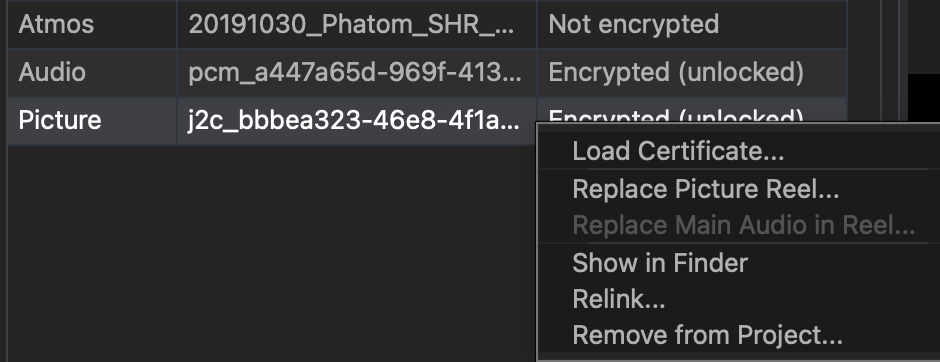
Select the imported MXF in Imported Media and review its metadata.
Confirm that you selected the intended picture or audio asset before opening the replacement command.
Open the Replace dialog
Right-click the imported MXF and choose:
- Replace Picture Reel for picture essence.
- Replace Main Audio in Reel for main sound.
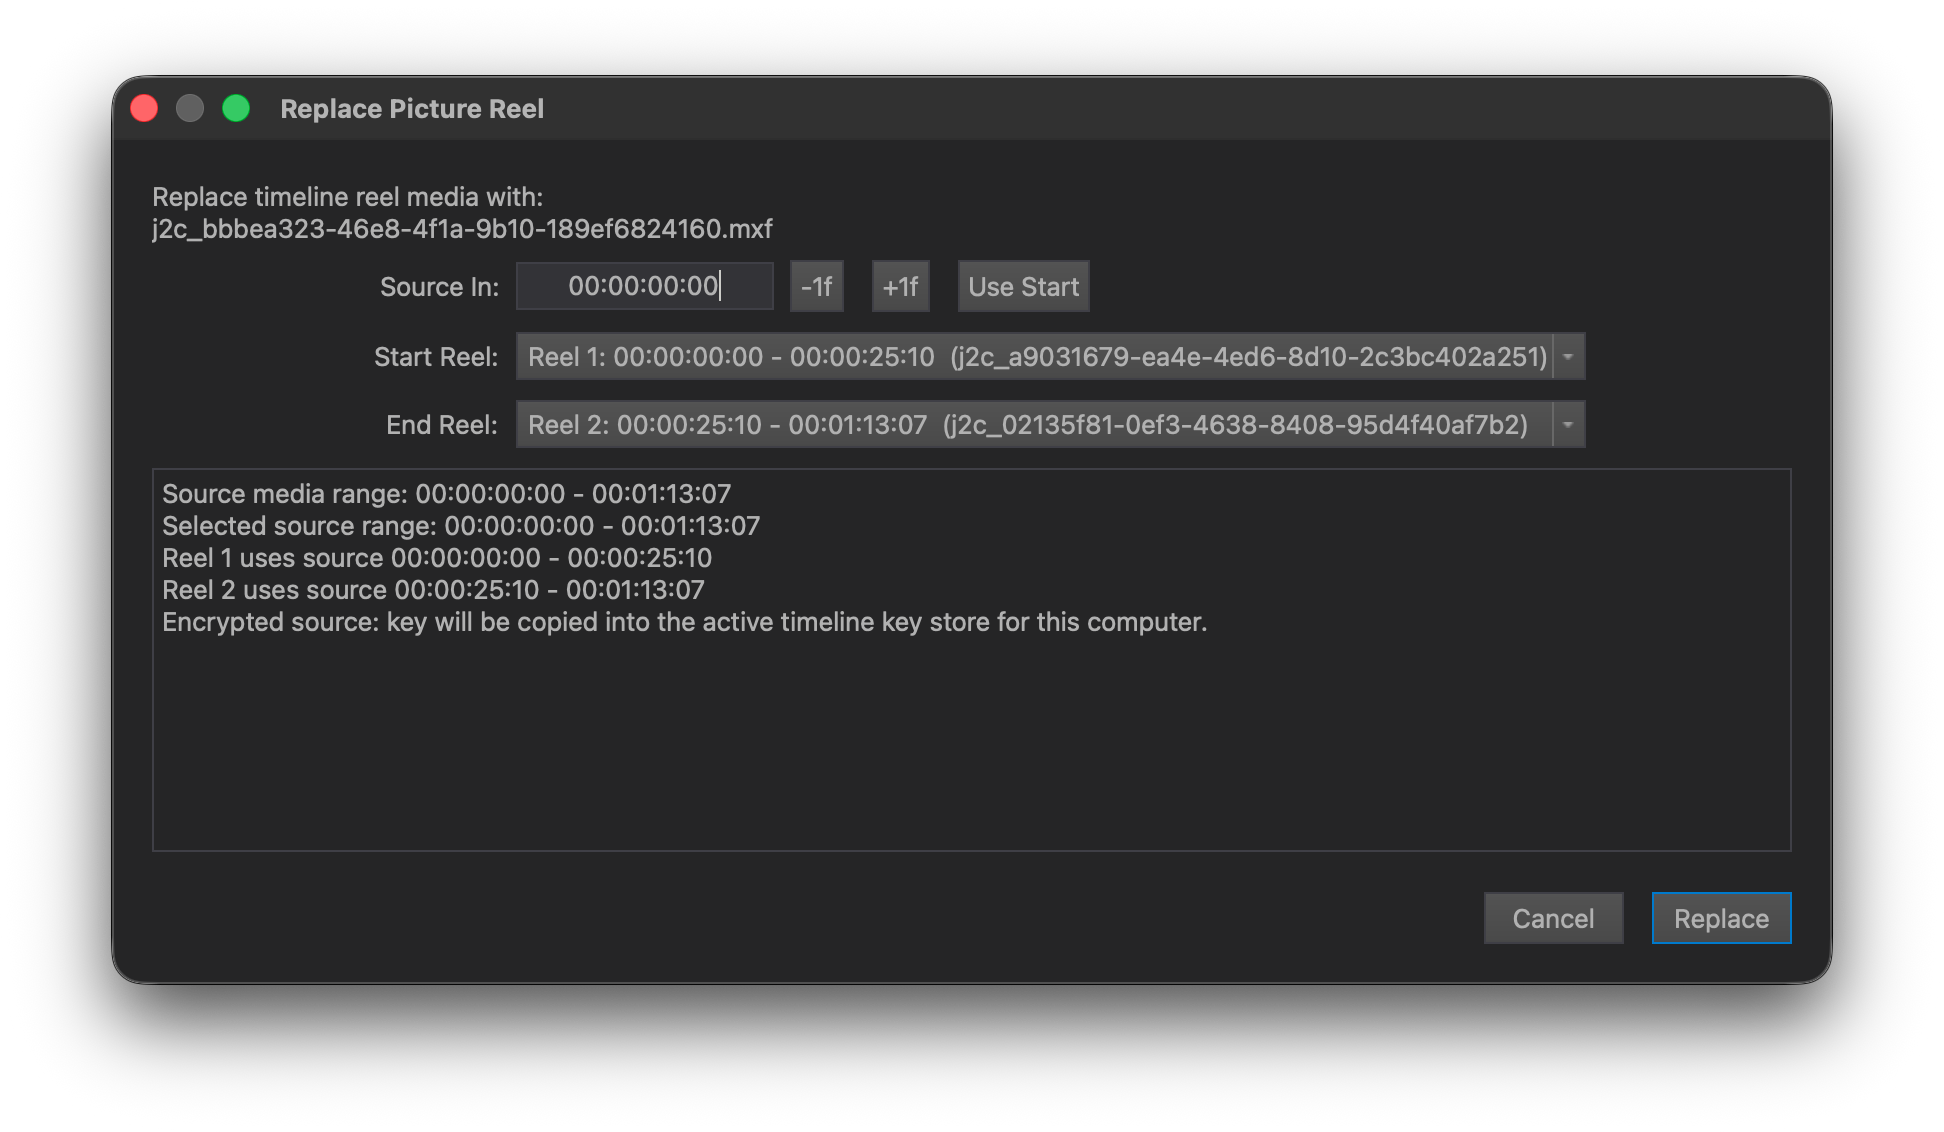
DaCaPo opens the Replace dialog.
Set Source TC In
Use Source TC In to choose where DaCaPo begins reading the replacement MXF.
This is useful when the imported asset contains more material than the Timeline section being replaced.
Choose Start Reel and End Reel
Set Start Reel and End Reel to define which Timeline reels receive the replacement.
Select one reel for a single-reel correction or a continuous reel range when the MXF covers several reels.
Review the replacement preview
The preview area shows how the selected MXF will be applied to the target reels.
Review the source start, reel range, and resulting coverage before confirming the replacement.
DaCaPo validates the replacement
Before replacement, DaCaPo validates:
- Encryption status
- Wrapping compatibility
- Frame-rate compatibility
- Asset duration
- Resolution compatibility for picture
- Audio-format compatibility for audio
Resolve any reported incompatibility before continuing.
Perform the replacement
Confirm after reviewing the preview and validation results.
DaCaPo replaces the selected picture or main-audio reels in the active Timeline. The imported source MXF itself is not modified.
Review the edited Timeline
Check:
- The correct reels were replaced.
- Picture or audio starts at the expected source position.
- Duration and reel boundaries are correct.
- Picture and audio remain synchronized.
- Subtitles and markers still align with the content.
- No blocking issues are reported.
Replace only part of a reel
If only a short section must be replaced, first split the Timeline before and after the affected section.
Enable Trim mode, position the playhead inside the reel, and use Split to create separate reels around the section.
Picture and audio are split at the selected frame. Subtitle references and marker positions are updated automatically.
Once the affected section is its own reel, replace only that reel.
Export and verify the corrected version
Export as a VF when unchanged assets can be reused from the OV.
Export as an OV when the delivery must be standalone or compatibility requires complete new assets.
Enable Verify After Export and perform playback QC on the replaced reels.
Common problems
The replacement command is unavailable
Confirm that the selected asset is a supported DCP picture or audio MXF.
The MXF is rejected as incompatible
Check profile, wrapping, frame rate, duration, resolution, and audio format.
The replacement starts at the wrong point
Review Source TC In.
The wrong reels were changed
Review Start Reel and End Reel before confirming.
Only part of a reel needs replacement
Split the Timeline before and after the affected section first.