What you’ll learn
- What a DCP Sign Language video track is and how it is viewed in a cinema.
- Why Sign Language video is always 24 fps, even when the DCP uses another frame rate.
- How to prepare a Sign Language source video.
- How to choose Import Sign Language.
- How to select the correct Sign Language code.
- How DaCaPo creates the SMPTE Sign Language MXF and MCA metadata.
- How to add a Sign Language track with Track Tools.
- How to place the asset using Source TC In and a reel range.
- How to review it in the Sign Language Preview window.
- How DaCaPo prepares the Timeline for SMPTE RDD 52 export.
What is a Sign Language video track?
A DCP Sign Language track contains a synchronized video of a sign language interpreter. It provides an accessibility option for cinema viewers who use sign language.
The Sign Language video is separate from the main DCP picture. At a cinema equipped for Sign Language Video, the synchronized interpreter can be shown to the individual viewer on a compatible secondary accessibility display, typically in portrait orientation, while the main feature continues on the cinema screen.
This allows the Sign Language version to be carried inside the same DCP without permanently placing the interpreter over the main picture.
Workflow overview
- Prepare a 480 × 640 video at 24 fps.
- Choose Import Sign Language.
- Select the Sign Language code.
- Let DaCaPo create the SMPTE Sign Language MXF.
- Add a Sign Language track with + Sign.
- Select the imported asset in the Media tab.
- Choose Add Sign Language to Track.
- Set Source TC In, Start Reel, and End Reel.
- Review the result in Sign Language Preview.
- Complete the RDD 52 metadata and markers.
- Export and verify the package.
Before you begin
Prepare the source video and confirm that it belongs to the correct picture version.
The source must be:
- 480 × 640 pixels
- 24 fps
The 24 fps requirement applies to the Sign Language video itself, not to the frame rate of the main DCP. A Sign Language Video Stream remains 24 fps even when it is used with a DCP whose main picture runs at another supported frame rate.
Also confirm the intended Sign Language code and the reel range where the asset should be placed.
Choose Import Sign Language
Open the Media tab, click Import, and choose Import Sign Language.
Select the source video.
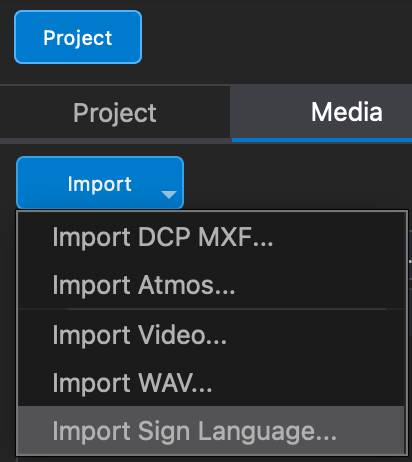
DaCaPo checks the source requirements
The source video must be 480 × 640 pixels at 24 fps.
Sign Language Video uses 24 fps independently of the main composition frame rate. Do not convert the Sign Language source to 25, 30, 48, or another frame rate simply because the DCP picture uses that rate.
If the source does not match the Sign Language Video requirements, correct it before continuing.
Select the Sign Language code
Choose the appropriate Sign Language code during import.
DaCaPo stores the selected code in the generated asset metadata.
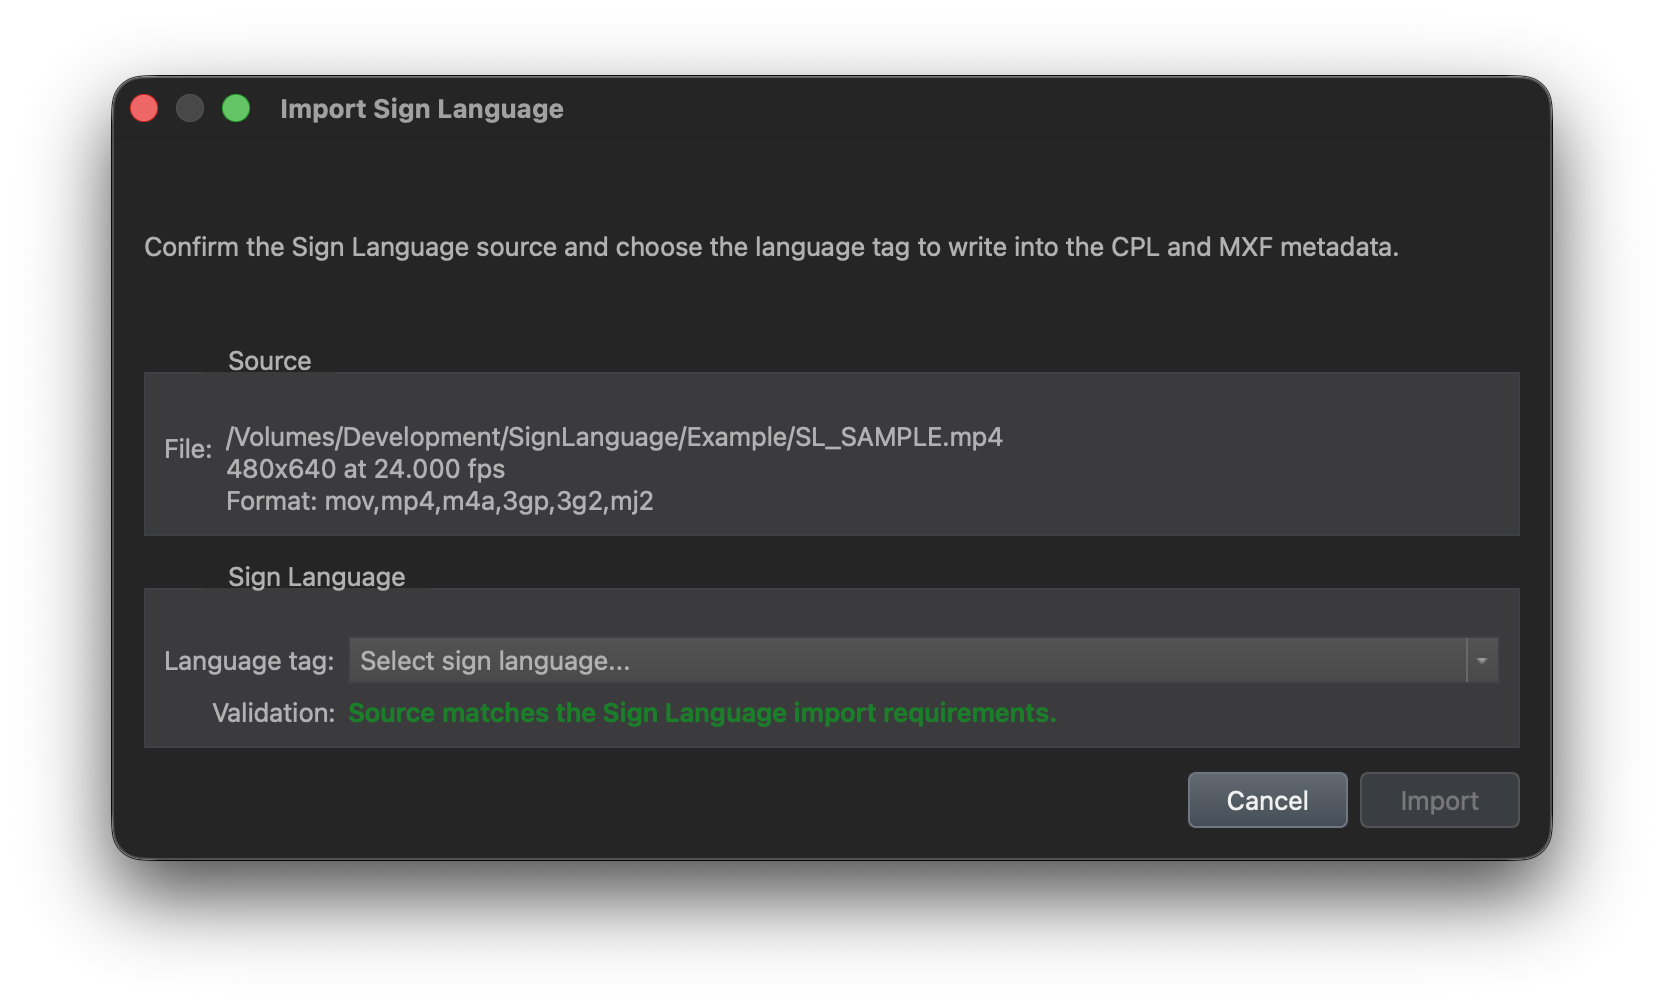
Convert the source video
Start the import after reviewing the source and Sign Language code.
DaCaPo converts the source into a Sign Language Video Stream and wraps it into a SMPTE MXF asset.
DaCaPo also adds the required MCA metadata.
After conversion, the generated asset is automatically added to Imported Media.
Import an existing Sign Language MXF
Import Sign Language is used for source video that must be converted.
If you already have a Sign Language MXF asset, use Import DCP MXF instead.
Add a Sign Language track
Select the target Timeline and show Track Tools if the panel is hidden.
In the Audio section, click + Sign.
DaCaPo adds a Sign Language track to the active Timeline.
The + Sign button is available only when the Timeline supports Sign Language and does not already contain a Sign Language track.
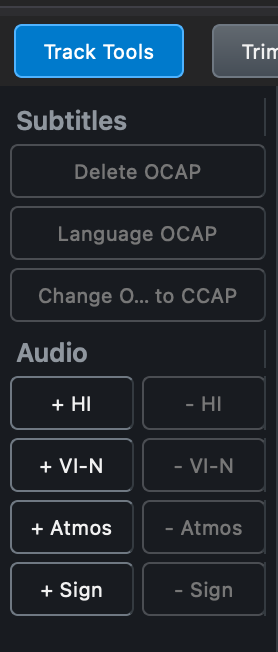
Select the imported Sign Language asset
Return to the Media tab and select the generated Sign Language MXF in Imported Media.
Review its metadata before placement.
Choose Add Sign Language to Track
Right-click the imported asset and choose Add Sign Language to Track.
DaCaPo opens the placement dialog.
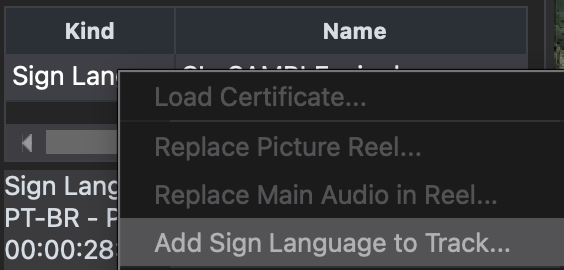
Set Source TC In and the reel range
The placement dialog lets you select:
- Source TC In
- Start Reel
- End Reel
Source TC In defines the timecode position in the source asset that DaCaPo uses at the start of the placement.
Use it when the Sign Language source contains material before the section that should be used on the Timeline.
Start Reel and End Reel determine which Timeline reels receive the Sign Language asset.
Review the source position and reel range before continuing.
DaCaPo validates the placement
Before placement, DaCaPo verifies that the selected asset is compatible with the target Sign Language track and Timeline.
If the asset is rejected, review the target Timeline, Source TC In, duration, and selected reel range.
Add the asset to the Timeline
Confirm the placement after reviewing the settings.
DaCaPo adds the asset to the Sign Language track.
Only one Sign Language asset can be placed on the track.
Review the Sign Language Preview
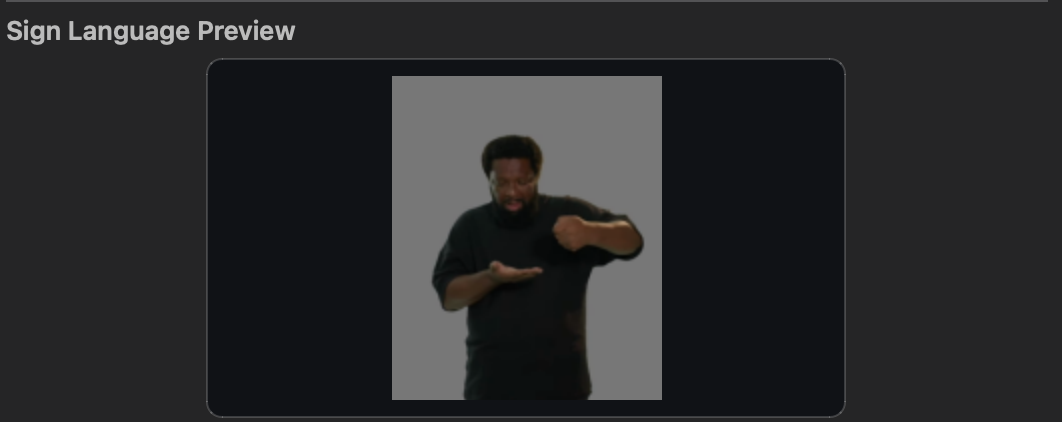
Open the Subtitles tab and use the Sign Language Preview window to review the interpreter video.
Use the preview to check the selected source, timing, placement, and synchronization with the active Timeline.
Complete the SMPTE RDD 52 requirements
When a Sign Language track is present, DaCaPo exports the Timeline as an SMPTE RDD 52 package and performs the required rewrap automatically.
Before export, the Timeline must also contain the required RDD 52 metadata and markers.
Any missing information is reported during export and must be completed before the package can be created.
Export and verify the package
Review the Timeline, Sign Language Preview, and Issues tab.
Export the Timeline after the required RDD 52 metadata and markers are complete.
Enable Verify After Export and review the completed SMPTE RDD 52 package before delivery.
Remove the Sign Language track
Click - Sign in Track Tools to remove the Sign Language track.
If the track contains media, DaCaPo asks for confirmation because the placed Timeline segment will also be removed.
Common problems
The source video is rejected
Confirm that it is 480 × 640 pixels at 24 fps.
The DCP uses another frame rate
This does not change the Sign Language Video frame rate. The Sign Language asset must still be 24 fps.
+ Sign is unavailable
The Timeline already contains a Sign Language track or the active DCP is not a supported SMPTE Timeline.
Add Sign Language to Track is unavailable
Confirm that the selected media is a supported Sign Language MXF and that the active Timeline contains a Sign Language track.
The placement is wrong
Review Source TC In, Start Reel, and End Reel.
A second Sign Language asset cannot be placed
Only one Sign Language asset can be placed on the track.
Export is blocked
Review the Issues tab for missing RDD 52 metadata or markers.
The preview is not visible
Open the Subtitles tab and confirm that the Sign Language Preview window is shown and the asset is placed on the active Timeline.