What you’ll learn
- How to import a Dolby Atmos MXF file.
- How DaCaPo verifies that the file contains Atmos essence.
- How DaCaPo finds associated sidecar metadata.
- How to add an Atmos track with Track Tools.
- How to place the Atmos asset using Source TC In and a reel range.
- Why Atmos cannot be monitored inside DaCaPo.
- How to export and verify the completed version.
Workflow overview
- Import the Atmos MXF into the Media tab.
- Review the import summary and detected sidecar metadata.
- Add an Atmos track to the active Timeline.
- Select the imported Atmos asset.
- Choose Place Atmos in Timeline.
- Set Source TC In, Start Reel, and End Reel.
- Confirm the placement.
- Review the Timeline.
- Export and verify the resulting DCP.
Before you begin
Make sure the Atmos MXF belongs to the same picture version as the target Timeline.
Confirm:
- The Atmos MXF is complete and available.
- Any associated sidecar metadata is stored in the same folder.
- The intended Source TC In is known.
- The Start Reel and End Reel are known.
- The active Timeline supports Atmos, such as a SMPTE Timeline.
Choose Import Atmos
Open the Media tab, click Import, and choose Import Atmos.
Select the Dolby Atmos MXF file.
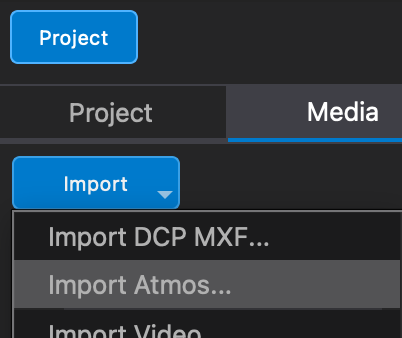
DaCaPo verifies the selected file
DaCaPo checks that the selected MXF contains Dolby Atmos essence.
If the file does not contain supported Atmos essence, it is not imported as an Atmos asset.
DaCaPo searches for sidecar metadata
During import, DaCaPo searches the same folder for associated Atmos sidecar metadata files.
Keep the Atmos MXF and its sidecar files together before importing so DaCaPo can identify the complete set.
Review the import summary
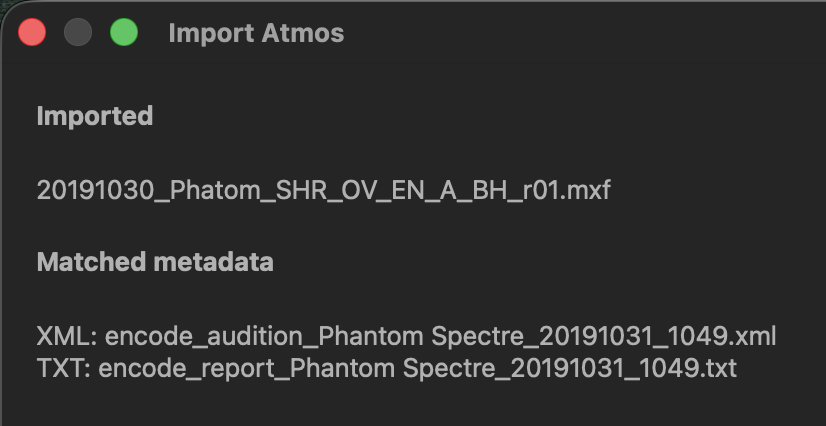
After import, DaCaPo displays a summary window.
The summary shows:
- The imported Atmos MXF.
- Any related sidecar metadata files found in the same folder.
Review the summary before continuing.
Add an Atmos track to the Timeline
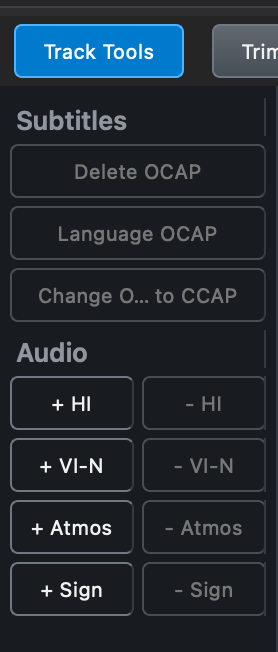
Select the target Timeline and show Track Tools if the panel is hidden.
In the Audio section, click + Atmos.
DaCaPo adds an Atmos track declaration to the active Timeline.
The + Atmos button is available only when an Atmos track is not already present and the Timeline supports Atmos.
Select the imported Atmos MXF
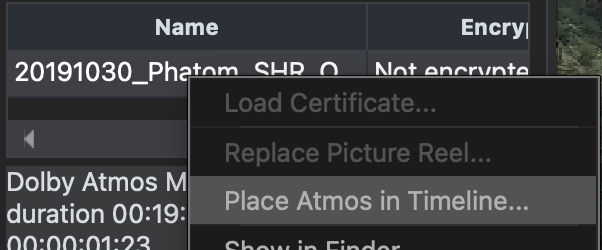
Return to the Media tab and select the imported Atmos asset in Imported Media.
Review the asset metadata before placing it on the Timeline.
Choose Place Atmos in Timeline
Right-click the imported Atmos MXF and choose Place Atmos in Timeline.
DaCaPo opens the Atmos placement dialog.
Set Source TC In and the reel range
The placement dialog lets you select:
- Source TC In
- Start Reel
- End Reel
Source TC In defines the timecode position in the Atmos source that DaCaPo uses at the start of the placement.
Use it when the Atmos source contains material before the section that should be placed on the Timeline.
Start Reel and End Reel determine which Timeline reels receive the Atmos content.
Review the source position and reel range before continuing.
DaCaPo checks compatibility
Before placement, DaCaPo verifies that the Atmos asset is compatible with the target track and Timeline.
If the asset is rejected, review the source file, target Timeline, Source TC In, and selected reel range.
Add Atmos to the Timeline
Confirm the placement after reviewing the settings.
DaCaPo places the Atmos MXF on the Atmos track for the selected reel range.
The main audio is not replaced.
Review the Atmos track
Atmos tracks can be placed and edited in the Timeline.
Review:
- The Atmos track is present.
- The expected reels contain Atmos segments.
- The source start is correct.
- The duration and reel boundaries are correct.
- No compatibility errors are shown in the Issues tab.
Atmos cannot be monitored in DaCaPo
Atmos tracks can be placed and edited, but they cannot be monitored within DaCaPo.
Review the Atmos source and final delivery using an appropriate external Atmos-capable system.
Export and verify the Atmos version
Review the Timeline and resolve any reported issues before export.
Export as a VF when compatible picture and main audio can be reused from the OV. Export as an OV when the package must be standalone.
Enable Verify After Export and review the resulting package before delivery.
Remove the Atmos track
Click - Atmos in Track Tools to remove the Atmos track declaration.
If Atmos media is already placed, DaCaPo asks for confirmation because the related Timeline segments will also be removed.
Common problems
The selected file is not imported as Atmos
DaCaPo could not verify supported Atmos essence in the selected MXF.
Sidecar metadata is missing from the summary
Confirm that the associated files are stored in the same folder as the Atmos MXF before importing.
+ Atmos is unavailable
The Timeline already contains an Atmos track or does not support Atmos.
Place Atmos in Timeline is unavailable
Confirm that the selected item is a successfully imported Atmos MXF and that the active Timeline contains an Atmos track.
The asset is rejected during placement
Review compatibility with the target Timeline, Source TC In, duration, and selected reel range.
No Atmos audio is heard during playback
Atmos cannot be monitored inside DaCaPo. Use an external Atmos-capable playback and monitoring system.