Watch this tutorial
This video walks through the complete workflow of importing a video file, choosing the DCP settings, and creating an Original Version DCP in DaCaPo.
What you’ll learn
- How to import a video file into DaCaPo.
- When to use Create OV instead of Transcode Only.
- How to choose source gamma and colour space. If you're unsure which settings to use, see Choose Source Gamma and Colour Space .
- How to select DCP resolution and aspect handling.
- How to choose an SMPTE or Interop profile.
- How to review the preview before conversion.
- How DaCaPo handles source files without audio.
Supported source formats
DaCaPo supports common video containers including MOV, MP4, MXF, M4V, MKV, and AVI.
Numbered DPX, TIFF, PNG, and JPEG sequences use the same import window, but image-sequence-specific settings are covered in a separate guide.
Open the Media tab
Open the Media tab in the Project Panel. This is where DaCaPo imports, converts, previews, and manages media used by the project.
Choose Import Video
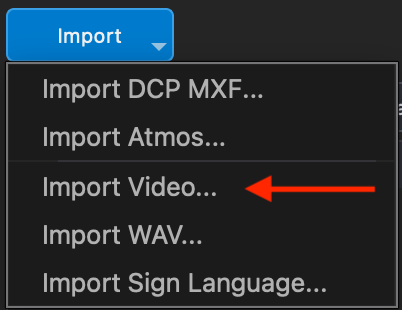
Click Import, then choose Import Video…. Select the source video file.
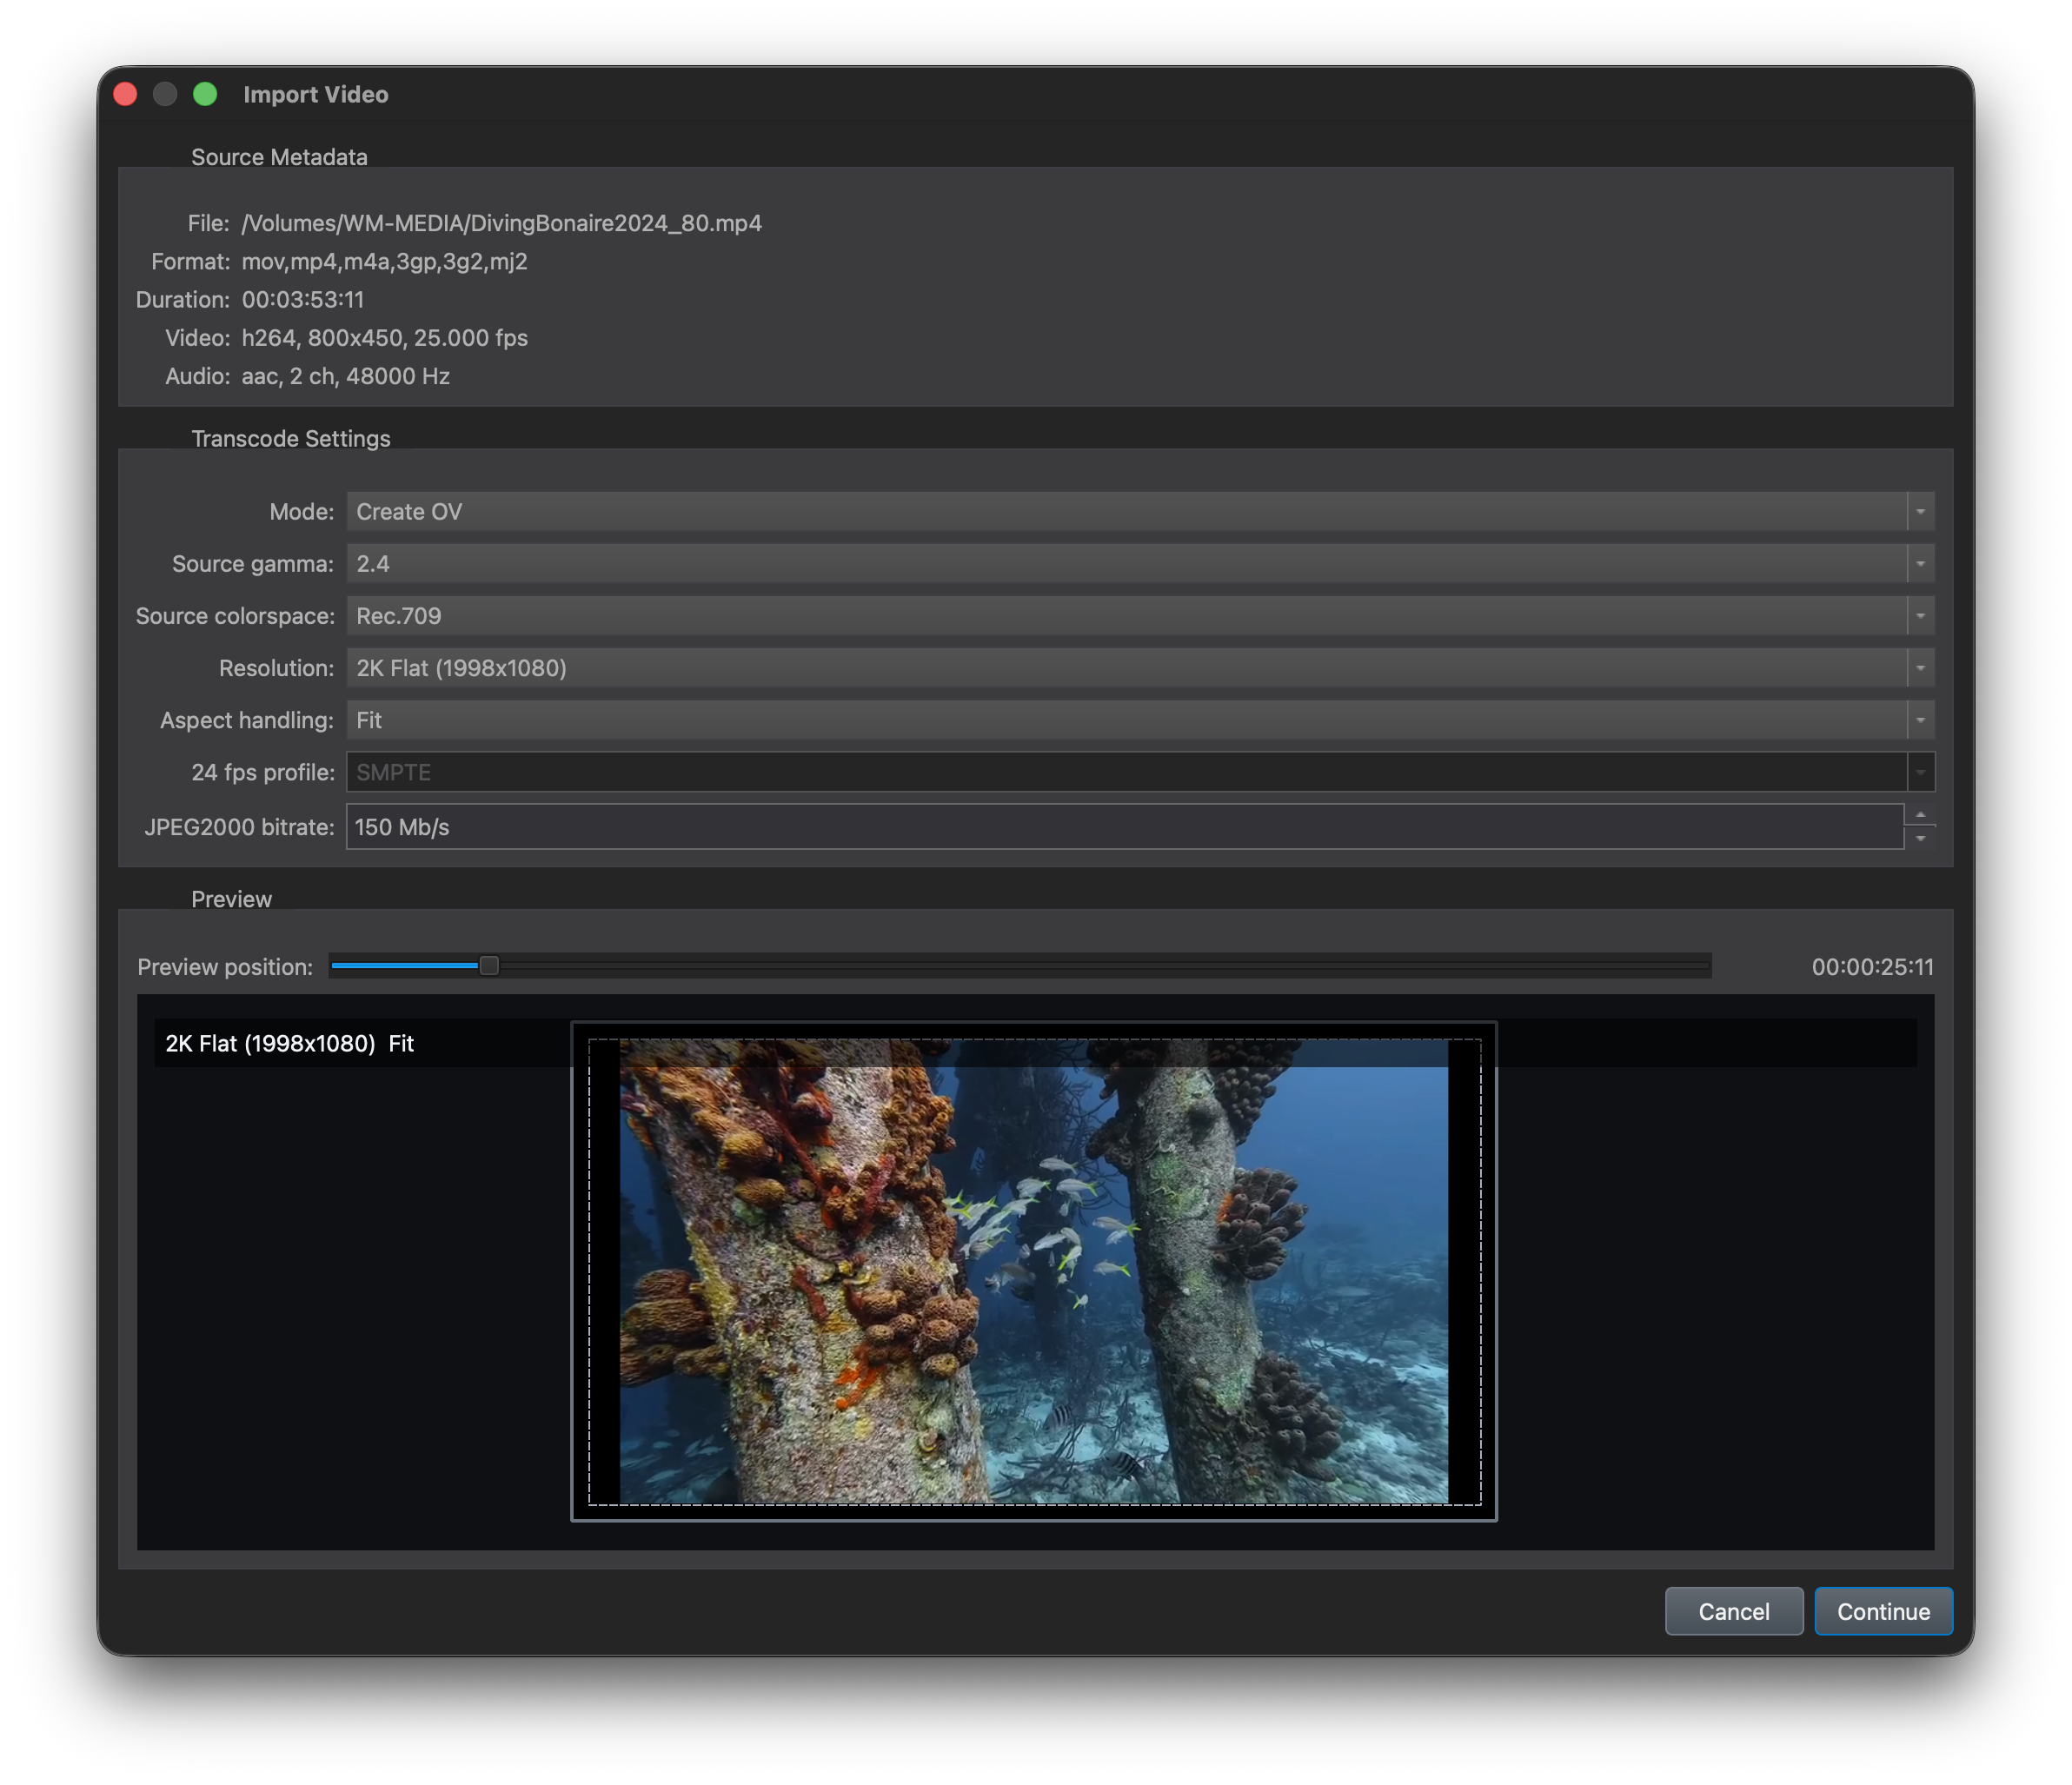
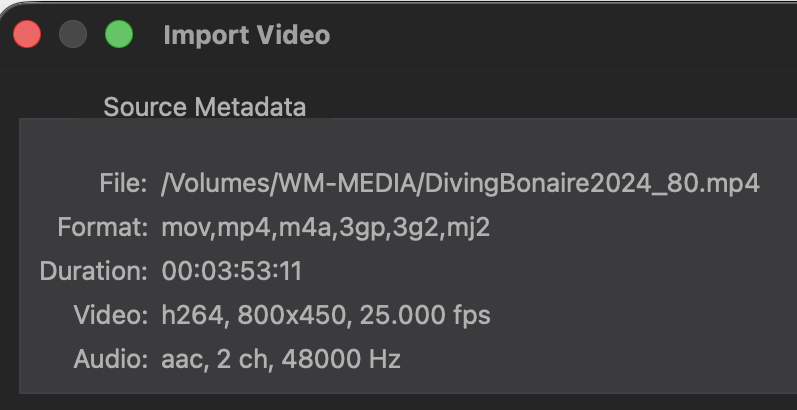
DaCaPo reads the source metadata and displays details such as resolution, frame rate, duration, picture format, and audio format in the Import Video window.
Select Create OV
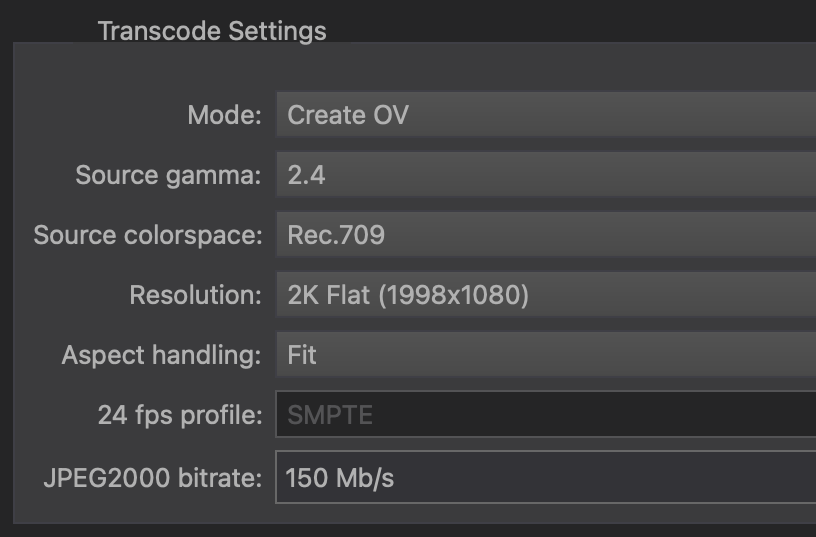
In the Mode menu, choose Create OV.
Create OV tells DaCaPo to create a complete Original Version package containing the transcoded picture, DCP-compatible audio, and all required DCP metadata.
Use Transcode Only when you only need new picture and audio MXF assets for use in an existing DCP. Transcode Only does not create a complete DCP package.
Configure the image settings
Source Gamma
Choose the gamma that describes the source file: 2.2, 2.4, or 2.6.
This setting tells DaCaPo how to interpret the source image before converting it for digital cinema. It should match the source mastering or export settings rather than the display you happen to be using.
Source Colour Space
Choose the colour space used by the source: Rec.709, P3-D65, or P3-DCI.
DaCaPo uses this information together with the gamma setting to convert the source image into the DCP picture colour representation.
Read Choose Source Gamma and Colour Space for a detailed explanation of Rec.709, P3-D65, P3-DCI, and gamma 2.2, 2.4, and 2.6.
Choose the DCP resolution and aspect handling
Select one of the available output formats:
- 2K Flat
- 2K Scope
- 4K Flat
- 4K Scope
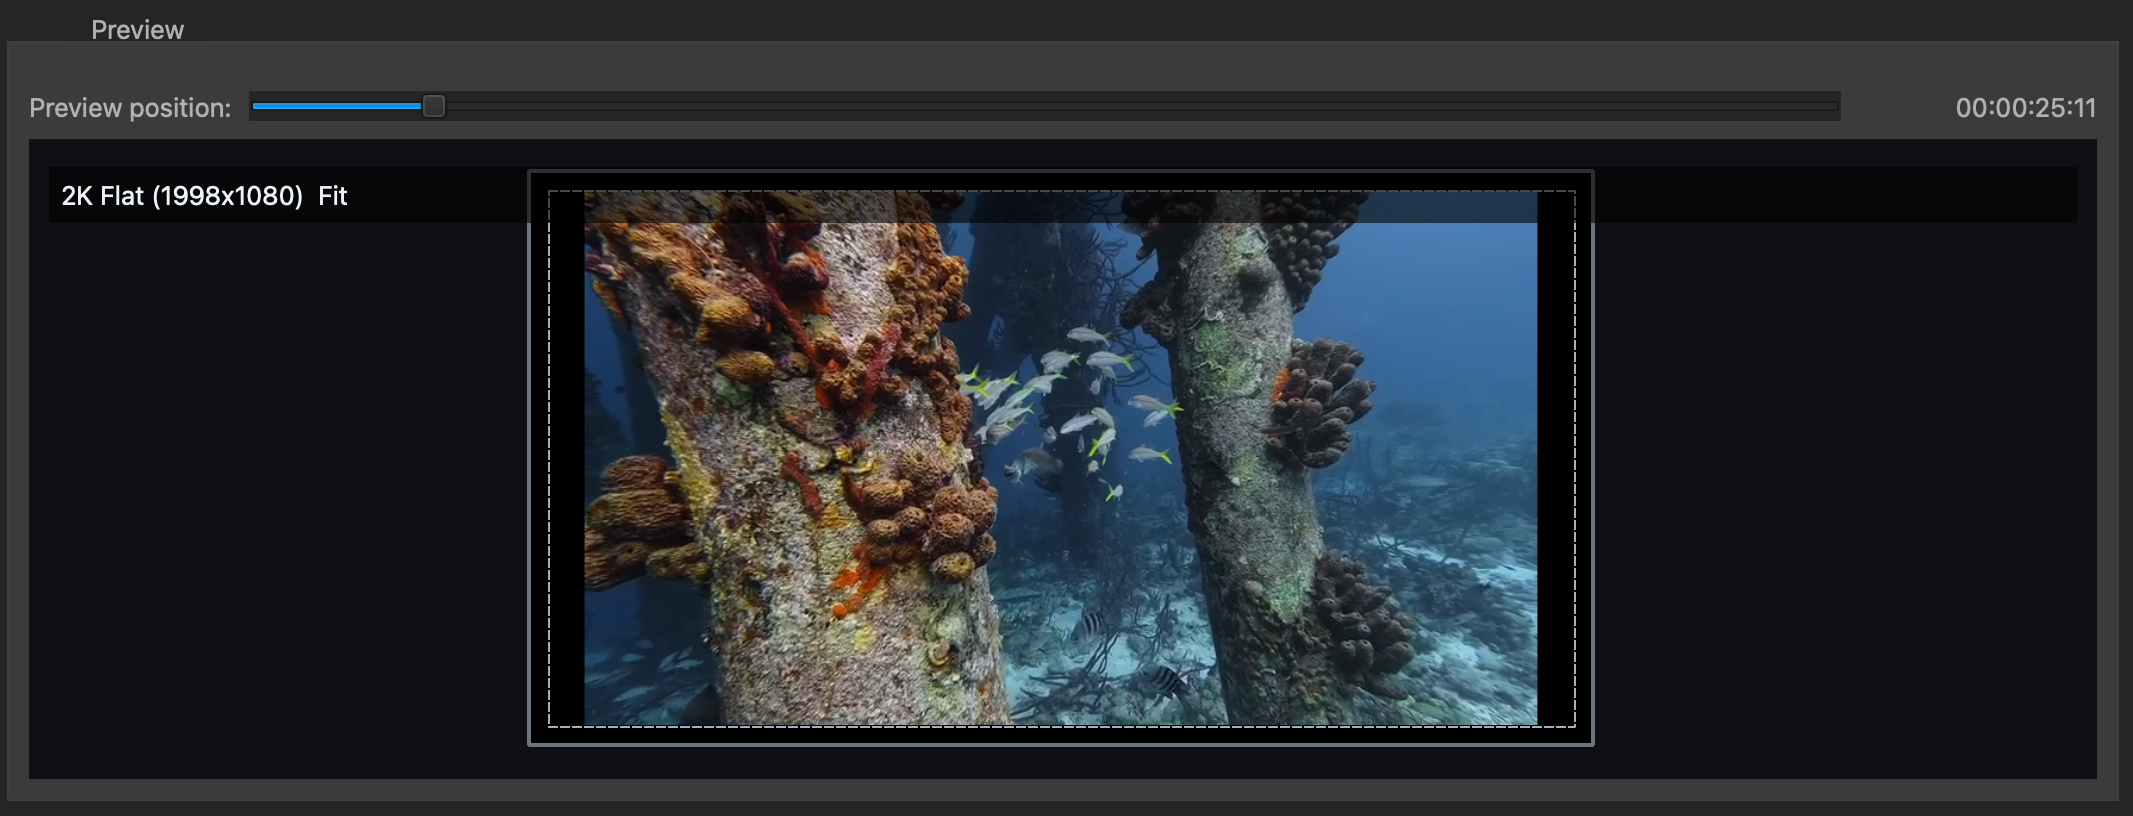
Then choose how DaCaPo should place the source inside the selected DCP container:
- Fit keeps the complete source image visible. This may add unused image area when the source and DCP container have different aspect ratios.
- Crop fills the selected DCP container and removes image area that falls outside it.
Use the preview to confirm that important picture information is neither cropped nor incorrectly scaled.
Choose the DCP profile
Choose SMPTE or IOP according to the delivery requirement.
SMPTE is the modern DCP standard and should generally be used unless a specific Interop delivery is required. In the current DaCaPo workflow, IOP creation is available for 24 fps sources.
Set the JPEG2000 bitrate
The JPEG2000 bitrate controls how much compressed picture data DaCaPo writes. A higher bitrate can preserve more detail but also creates larger picture MXF files.
Use the value required by the delivery specification or facility. When no special requirement exists, use DaCaPo’s normal default and verify the exported package before delivery.
Review the preview
Move the preview-position control to inspect representative frames from the source.
Check the following before continuing:
- The complete image is framed as intended.
- The Flat or Scope container is correct.
- Fit or Crop produces the intended result.
- The image does not appear unexpectedly washed out or too dark.
- No important titles, captions, or picture information are cut off.
The preview is especially important when the source aspect ratio differs from the selected DCP container.
Choose the destination and name the DCP
Click Continue after reviewing the preview and import settings.
Choose the folder where the new DCP should be created.
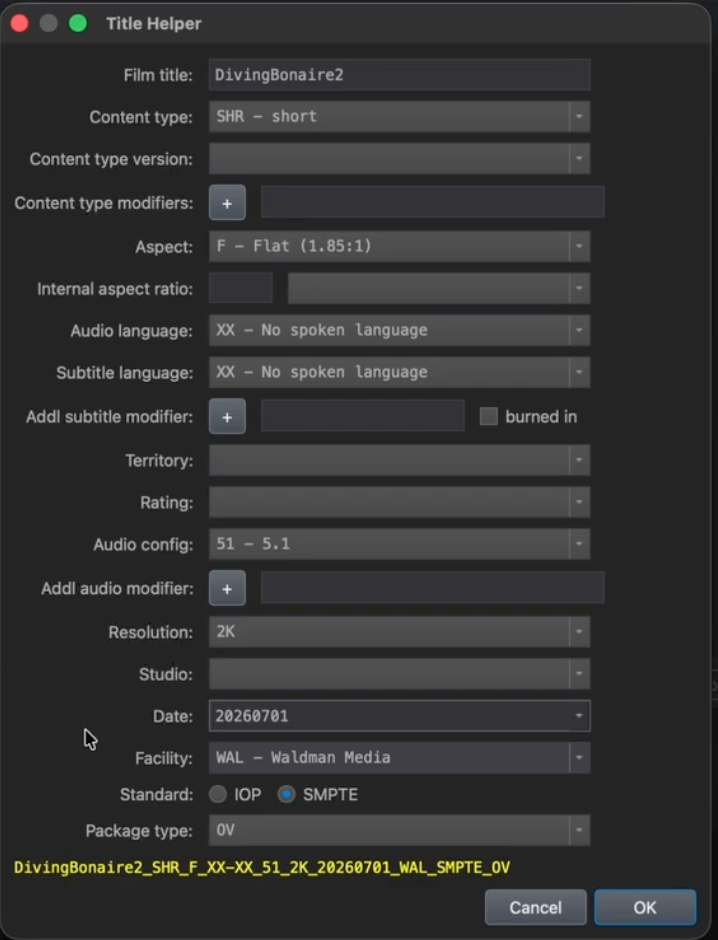
The Title Helper then opens. It generates an ISDCF-compliant package name automatically.
Select the appropriate content type, aspect ratio, audio configuration, resolution, and other metadata. Some fields may already be filled in from the source and the current import settings.
The generated package name is updated live as you edit the fields.
When the name and metadata are correct, click OK to begin the conversion and DCP creation.
DaCaPo transcodes the picture to JPEG2000, converts the source audio to DCP-compatible PCM audio, creates the required DCP metadata, and builds the Original Version package.
When the source contains no audio, DaCaPo automatically creates a silent audio MXF so that the resulting package has a valid audio asset.
After creation, DaCaPo automatically loads the new DCP into the project.
Verify the exported DCP
Every DCP should be verified before delivery or exhibition. Use DaCaPo’s verification tools to check package structure, metadata, assets, hashes, picture, audio, and composition information.
When available in the export workflow, enable Verify after export so verification starts automatically when creation finishes.
Common problems
The image is cropped incorrectly
Return to the import settings and compare Fit and Crop. Also confirm that the correct Flat or Scope output container is selected.
The image looks too dark or washed out
Confirm that Source Gamma and Source Colour Space match the actual source master. These settings describe the file, not the computer monitor.
Interop cannot be selected
Check the source frame rate. The current DaCaPo import workflow limits IOP creation to 24 fps.
The source has no audio
No additional action is required. DaCaPo creates a silent audio MXF automatically when Create OV is used.